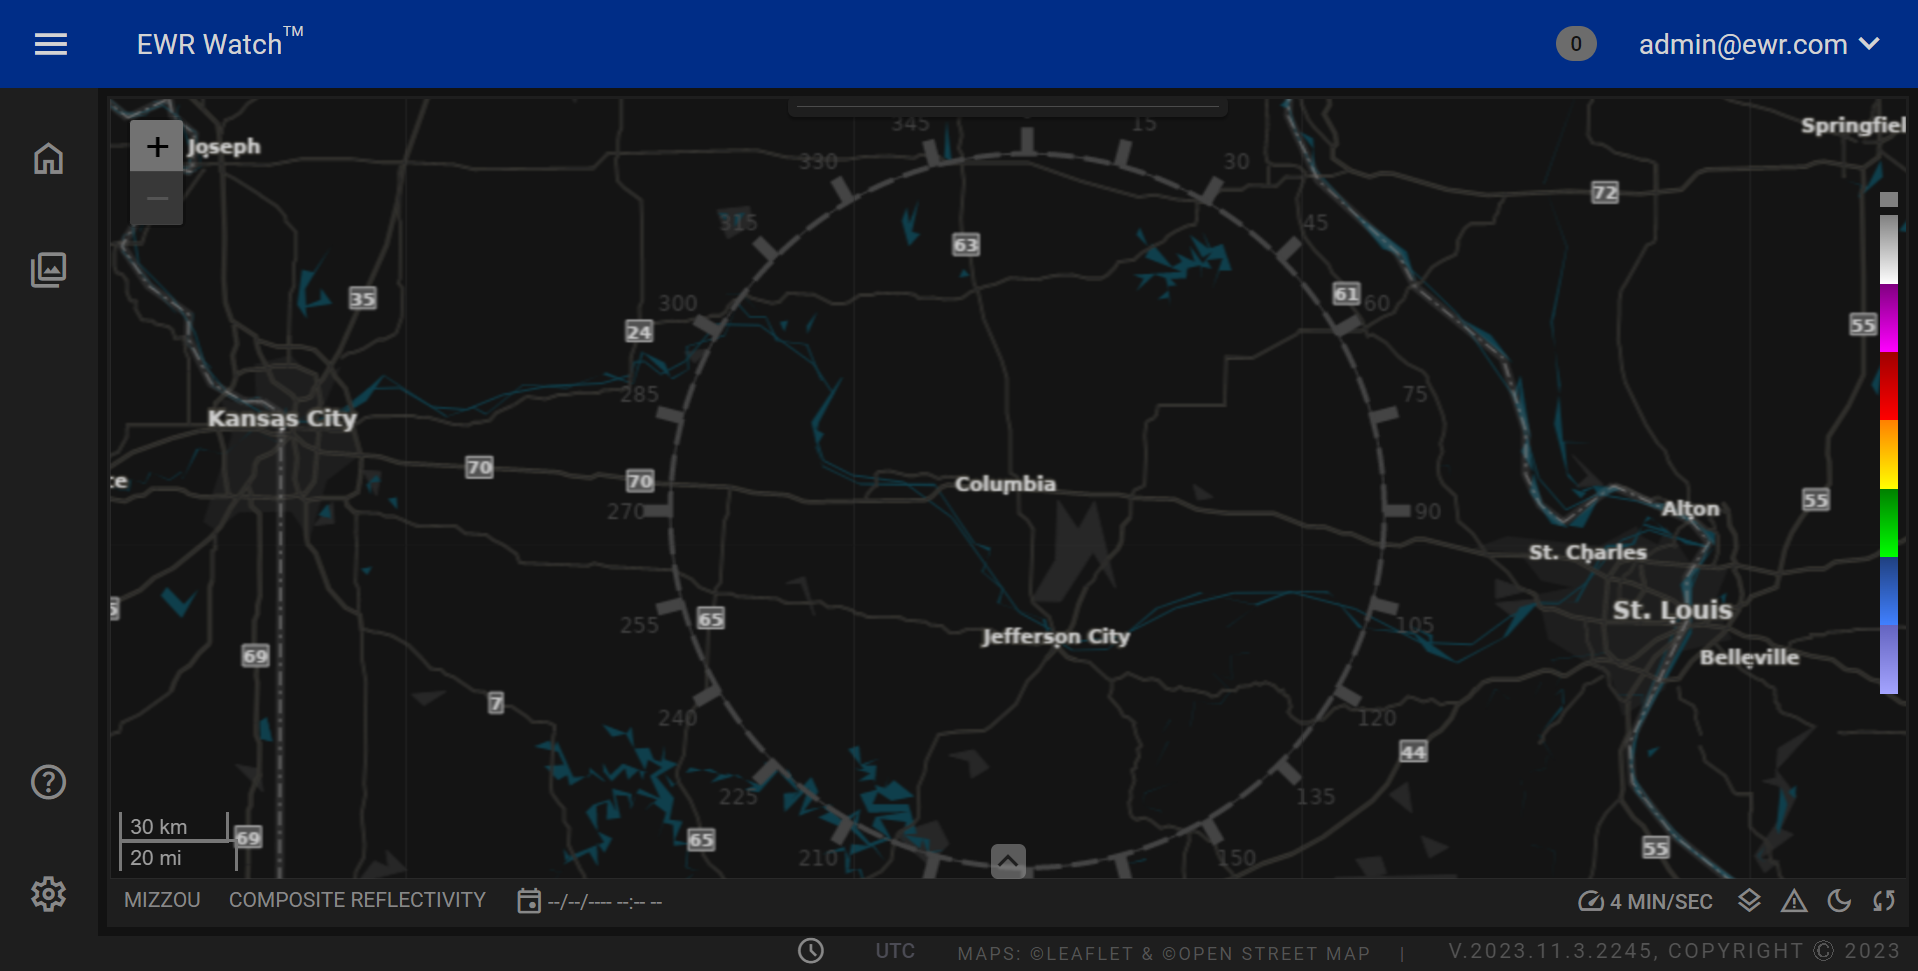
Home Screen Overview
The Home Screen this is where the majority of radar visual data will be displayed. The home screen is divided into four key sections. The header, main menu, panel area, and the footer.
Header

The header section of the program's home screen provides users with essential functionalities for navigation, user interaction, and program management. Here's a detailed description of the components within the Header
-
Main Menu Collapse Button
The menu collapse Button is a convenient feature that allows users to collapse or expand the main menu, providing flexibility in screen utilization. When clicked, it condenses the main menu, maximizing the space for the primary content. This button offers users the freedom to tailor their interface, enhancing their overall user experience.
-
Program Name
The program name is prominently displayed in the header, serving as a clear identifier of the application.
-
Alerts
The header features a dedicated section displaying the number of alerts you have, ensuring you stay informed in real-time. When you click on the alerts indicator, a seamless and user-friendly popup menu instantly appears, presenting a detailed list of your alerts.
-
Current User and Profile Menu
The current user section displays the username of the currently logged-in user, personalizing the experience. Additionally, it functions as a Profile Menu when clicked, revealing four key options:
-
Profile
Users can access and modify or change their profile password in the Profiles Page.
-
User
The users page allows administrative users to manage other user accounts, enabling tasks such as user creation, modification, or deletion. Non-admin users might see this option as a simple display of their username.
-
Roles
The roles page allows administrators to manage user roles within the program. administrators can assign, modify, or revoke roles based on permissions, ensuring efficient access control and data security. This may only be visible to administrators. To view the Roles documentation page click.
-
Logout
Users can securely log out of their accounts, ensuring data privacy and account security. Clicking this option redirects users to the logout process, ending their session and returning them to the Login Screen.
-
Main Menu

The main menu serves as the central hub of the program, providing quick and easy access to essential features. It is thoughtfully designed to enhance user experience and streamline navigation. Here's a breakdown of the main menu options:
-
Home Button
The home button is your direct gateway to the program's primary interface. By clicking on the Home button, users are swiftly brought back to the main screen, allowing for effortless navigation between different sections and tasks.
-
Product Menu
The product menu is where users can explore a comprehensive list of available products, errored products, and archived products, offered by the program. It acts as a catalog, allowing users to view detailed information about each product. Navigating this menu enables users to learn more about specific products, making informed decisions tailored to their needs.
-
Documentation
Click the ? icon to be directed to our comprehensive documentation page. Here, you can find detailed guides, tutorials, and FAQs to enhance your understanding of our services and features.
-
Settings Menu
The settings menu is a crucial component, empowering users to personalize their experience within the program. Within this menu, users can adjust various preferences and configure other options to align the program with their individual requirements. It offers a user-friendly interface, ensuring users can easily modify settings according to their preferences. The settings menu is usually reserved for the system administrators.
Panel Area
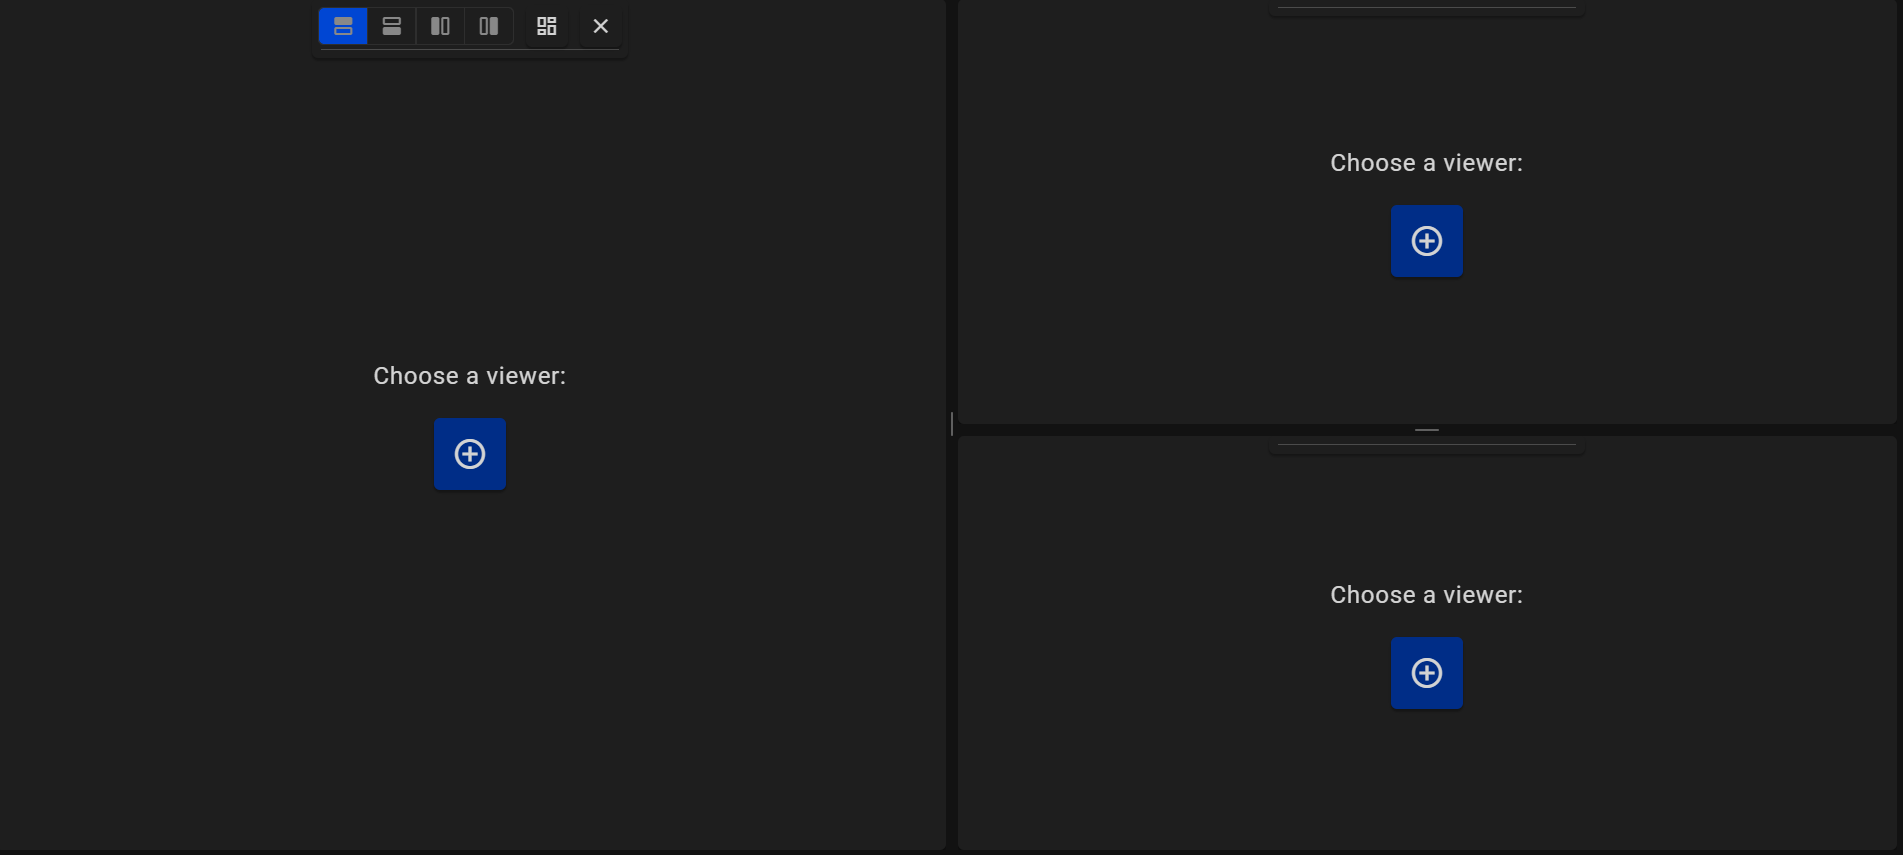
The panel area serves as the dynamic focal point of the program's home screen, providing users with an immersive and interactive experience. In this area, users will spend most of their time exploring radar data and pedestal information. The panel area can host multiple panels up to nine individual panels. The panel area is every component below the header to the right of the main menu and above the footer. below is an in-depth look at the features and functionalities within the panel area.
-
Product Panel
Introducing our state-of-the-art radar product display panel, a cutting-edge solution designed to provide real-time, comprehensive radar information in a visually intuitive format. This innovative panel seamlessly integrates radar data onto a map, presenting it in a dynamic coverage ring that revolutionizes the way you perceive and analyze spatial information. -
Pedestal Panel
Introducing our pedestal panel, the ultimate hub for comprehensive technical information and real-time monitoring of radar systems. This advanced panel has been meticulously designed to provide users with a detailed overview of the selected radar, including crucial technical data, radar motor temperature, and instant alerts through a user-friendly message box for warnings and issues.
Footer

The footer of the program's home screen provides users with essential information and functionalities for seamless navigation and system monitoring. Here's a detailed description of the components within the Footer:
- Process Functionality Button
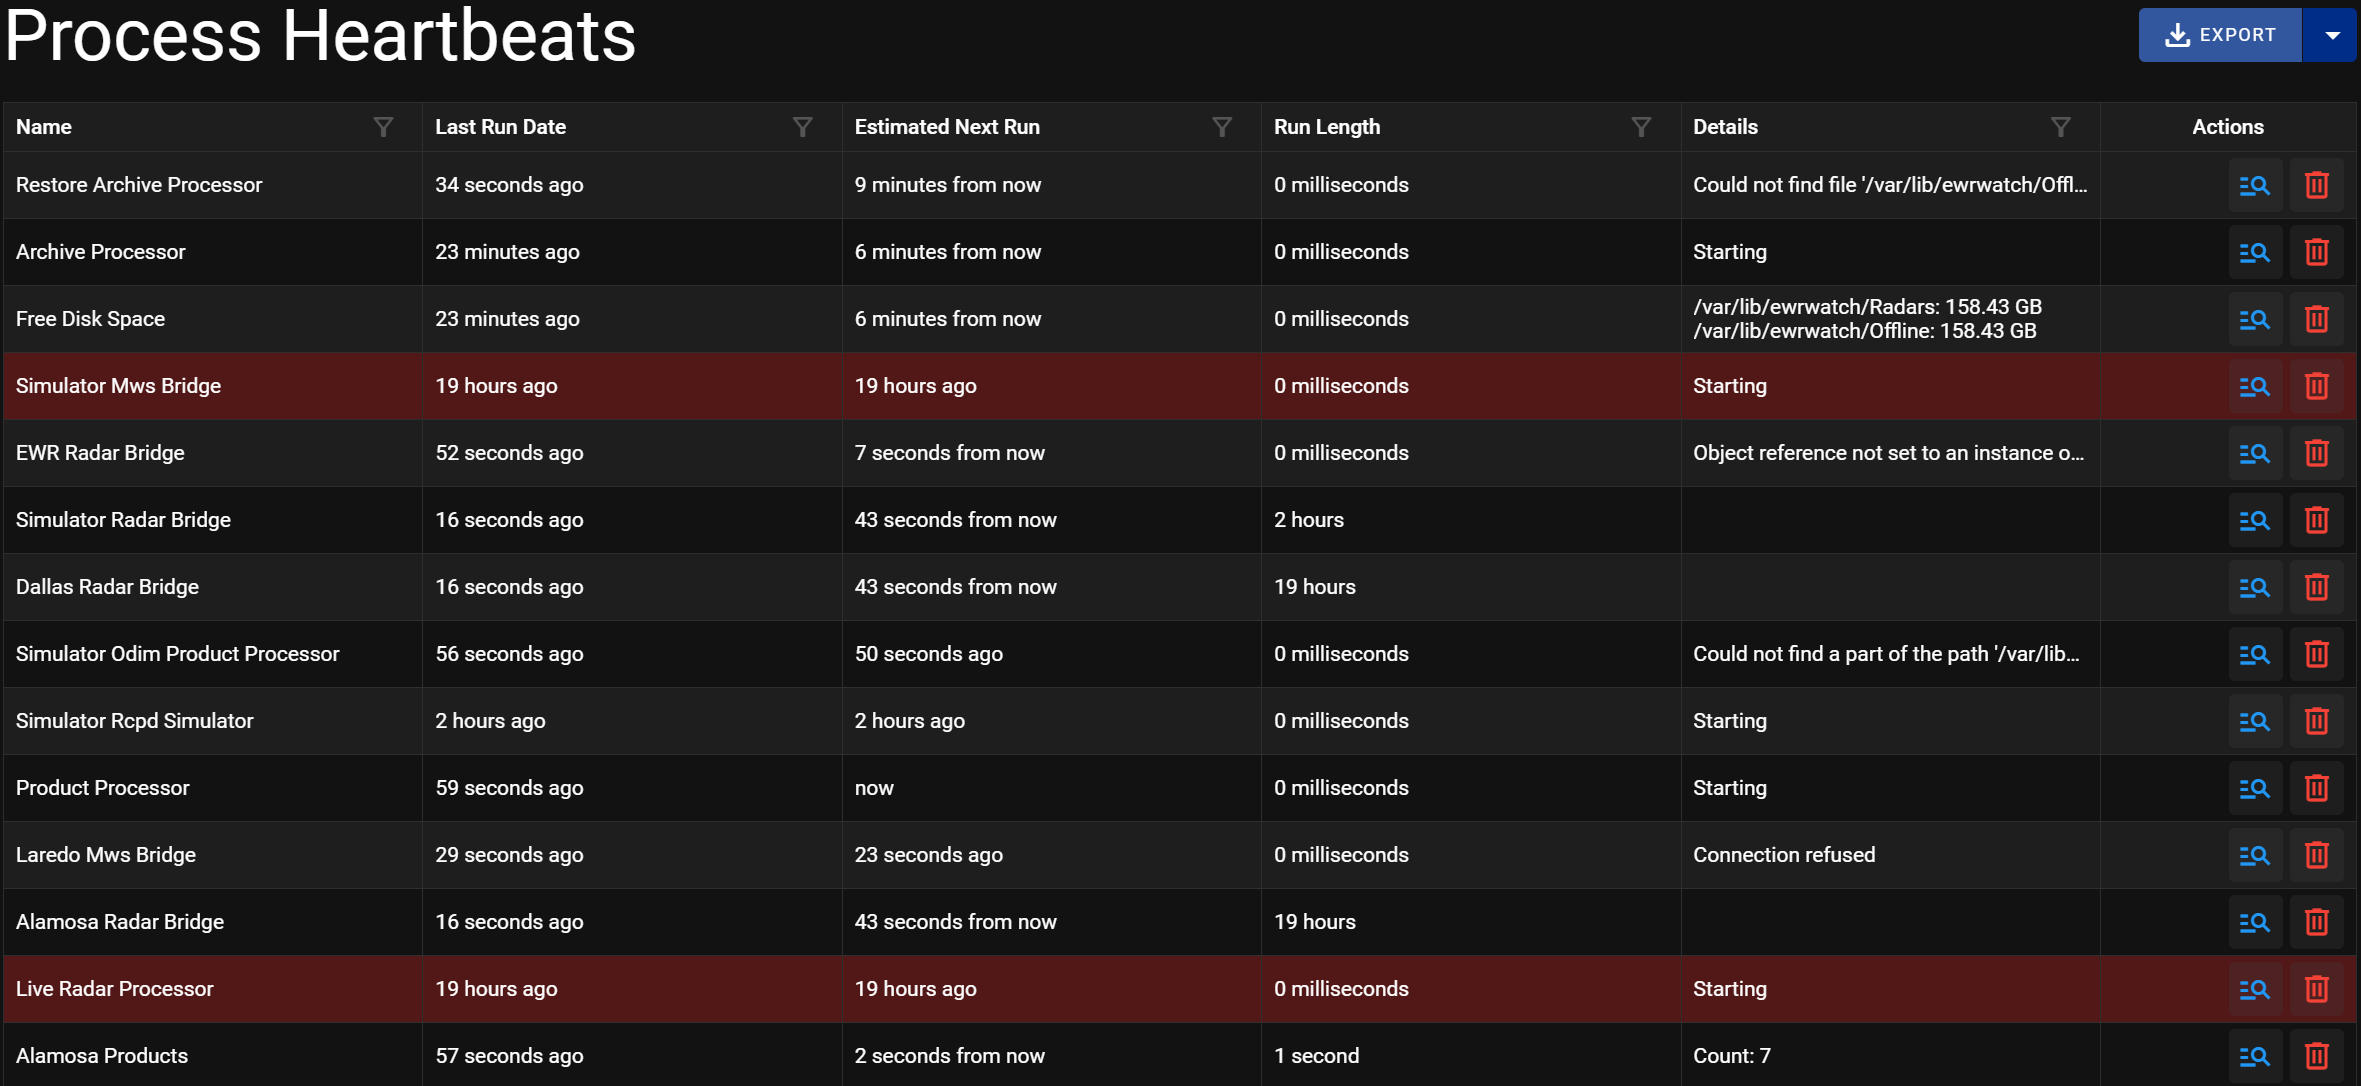
The process heartbeat functionality button in the footer provides users with a tool to check the status of vital background processes. By clicking this button, users will go to the process heartbeats page check to ensure that all system processes are running correctly. This feature enhances system reliability by allowing users to monitor the health of essential functions, promoting a smooth user experience and preventing potential disruptions.
-
UTC Time Zones
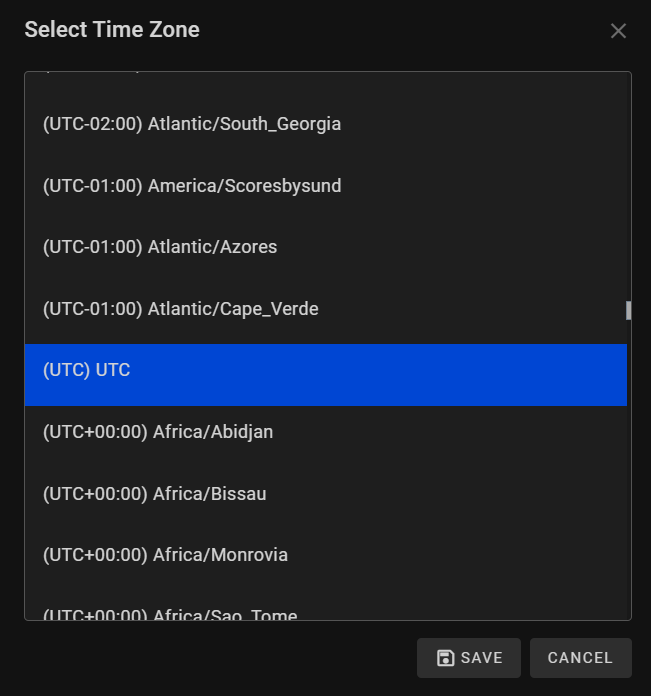
The UTC button is a convenient and user-friendly feature designed to enhance your experience when dealing with different time zones. This intuitive tool simplifies the process of selecting and converting time across various regions, making it effortless to coordinate weather events, radar data or any time-sensitive activities worldwide. -
Select Unit
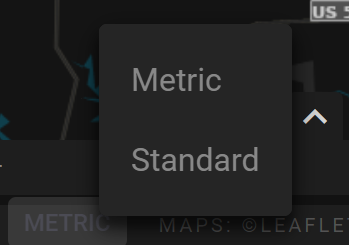
The unit selection button is a interface element designed to enhance the flexibility and customization of measurement units within the program. Positioned conveniently in the footer, this button allows users to tailor their experience by choosing their preferred unit of measurement. -
Map Overlay Name
The map overlay name offers users clear context about the specific map layer or geographical data currently displayed on the screen. Whether it's geographic features, or satellite imagery, this information helps users interpret the visual data accurately. It ensures that users are aware of the geographic context of the displayed information, enhancing their understanding and decision-making capabilities. -
Version Number
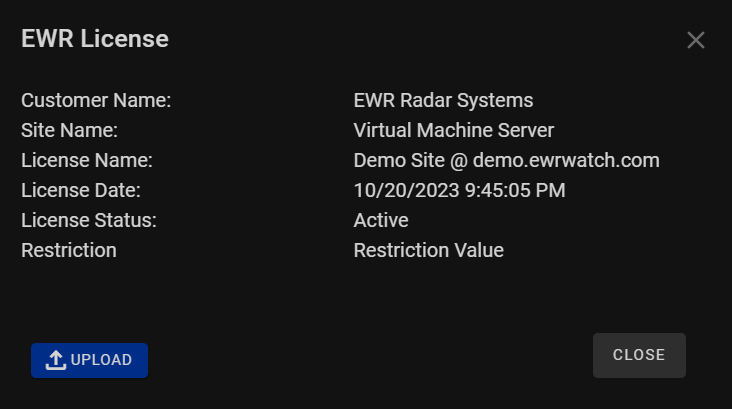
The version number prominently displayed in the Footer indicates the current version of the program. This information is pivotal for users and administrators as it allows them to track the software's version. Staying up-to-date with the latest version ensures users have access to new features, security enhancements, and bug fixes, promoting optimal performance and security. When clicked the view license pop up box will appear offering users the ability to access and review the program's licensing information and upload a copy of the license. By clicking this button, users can view details about their current license, including license name, license date, license status, customer name, site location, and any associated usage limitations. This feature promotes transparency enabling users to stay informed about their software license status.