Users
The User Page is a fundamental component of our program that provides a clear and concise overview of user information. Designed with simplicity and efficiency in mind, this page displays a grid with two essential columns: User Name and Email.
Data Grid
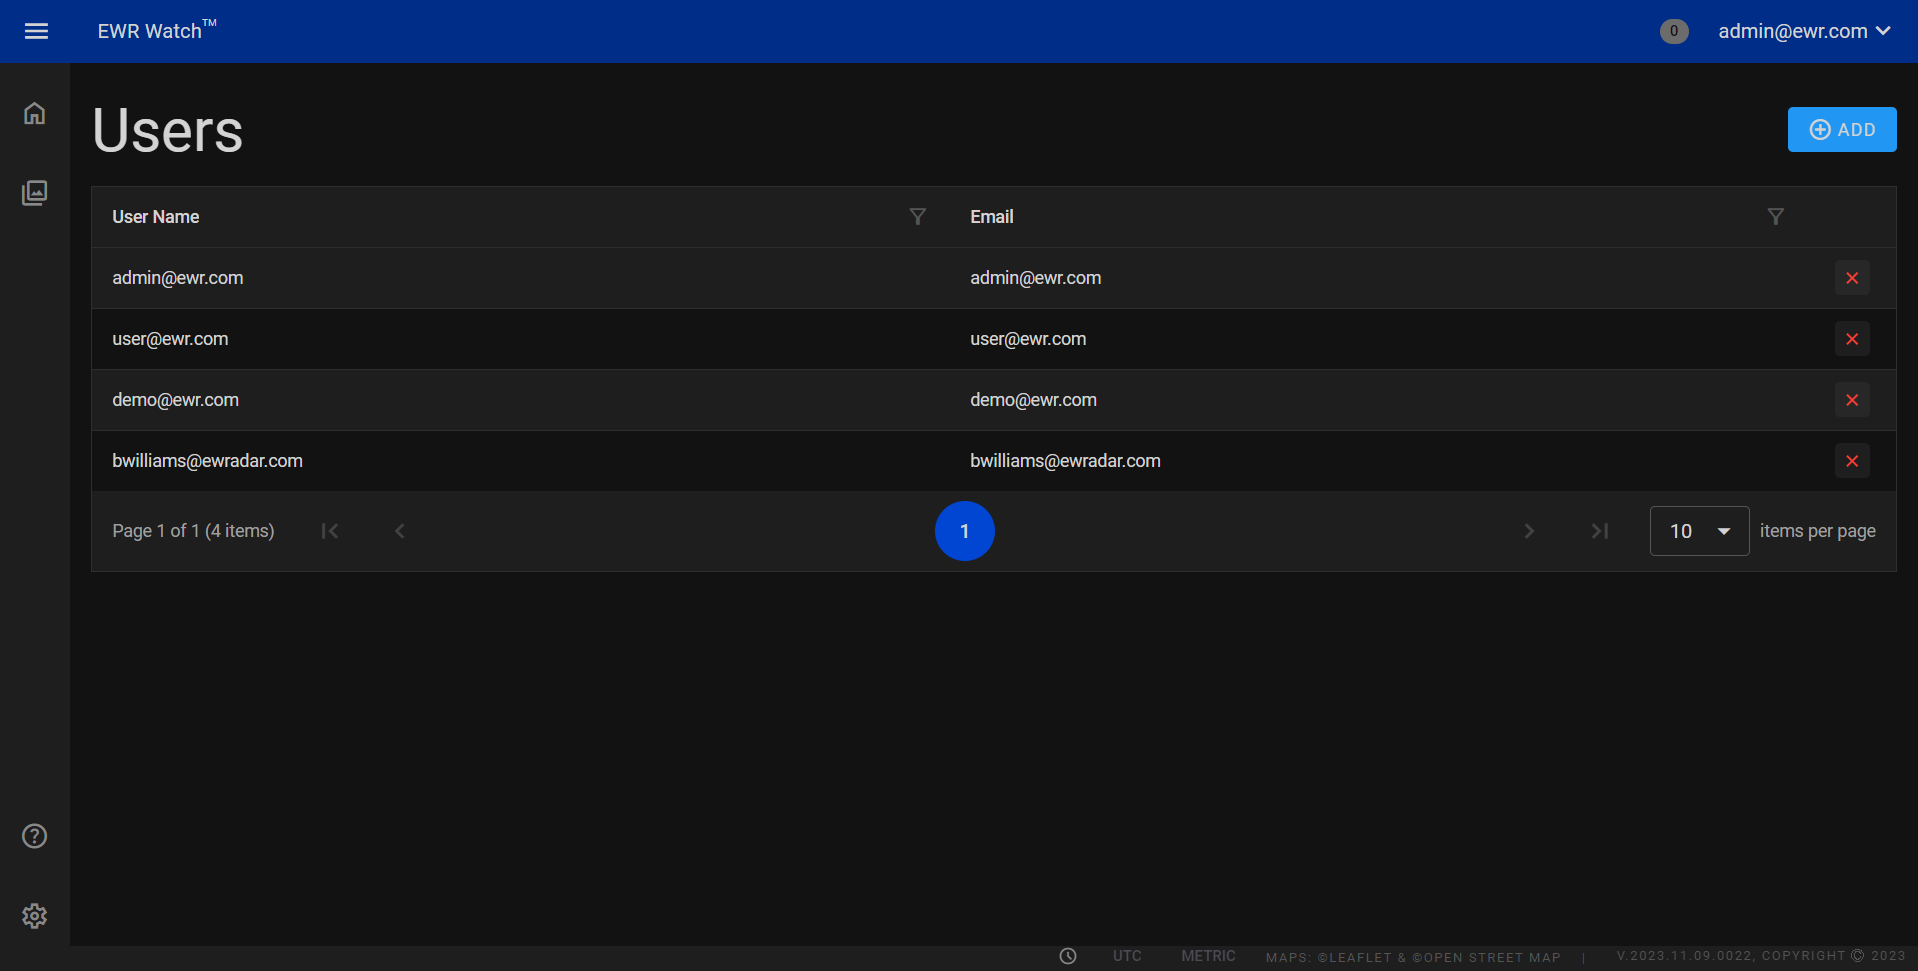
Columns
-
User Name
This will be provided by your system administrator. While the format of the username must be in e-mail format the actual e-mail address need not exist. -
Email
The corresponding column displays the email addresses associated with each user. This information is vital for communication purposes, enabling seamless interaction between users, administrators and allowing password reset.
Actions
- Delete
Clicking Delete removes the respective user from the system. This action is useful when retiring Users accounts that are inactive and decluttering the interface. Users can confidently remove redundant or obsolete user profiles, streamlining the application's management process.
Add User
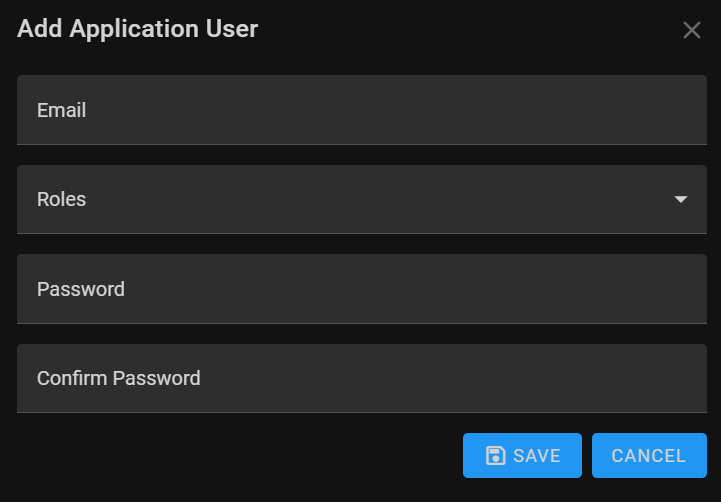
To add a new user to the system, follow these simple steps. When initiating the process, a dialog box will appear, allowing you to input the necessary information. Here’s a breakdown of the fields you need to fill in:
-
Email
This will be provided by your system administrator. While the format of the username must be in e-mail format the actual e-mail address need not exist.Required: Yes Validation: Must be in the form of a valid e-mail address. Example: yourusername@example.com -
Roles (Dropdown Checkboxes)
Select the appropriate role(s) for the user from the dropdown checkboxes. Roles define the user’s permissions and access levels within the system. Choose one or multiple roles based on the user’s responsibilities. Available roles may include Admin, User, or other custom roles tailored to your organization's needs. -
Password
The Password To ensure secure access. Passwords are case-sensitive, meaning "Password123" and "password123" would be considered different.Required: Yes Validation: The password must be six characters long, one uppercase letter, one lowercase letter, a digit and one alphanumeric character. Example: Password1! -
Confirm Password
Re-enter the password in this field to confirm and ensure its accuracy. This step prevents typographical errors and ensures the user has entered the intended password.
Once you have filled in the required fields, click the appropriate button (e.g., 'Add User' or 'Save') within the dialog box to confirm the user addition. The system will process the information, and the new user will be successfully added, ready to access the specified functionalities based on their assigned roles.
Edit User
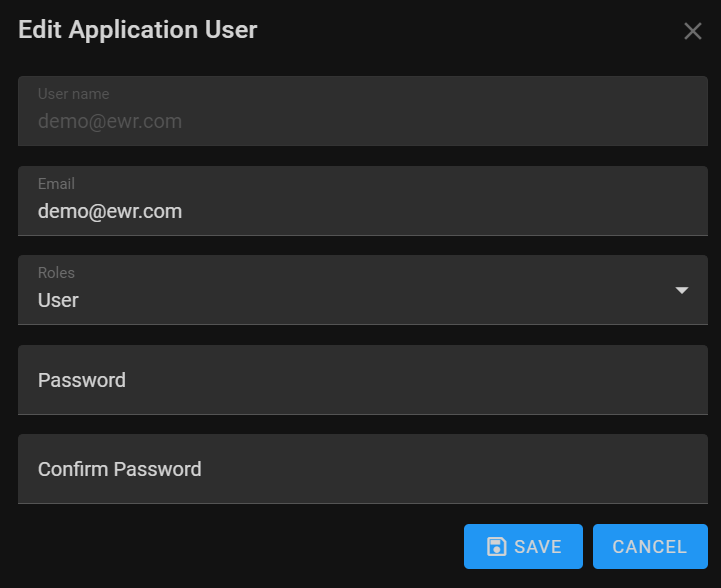
Editing a user allows administrators and authorized personnel to update user information as needed. When editing a user, you have the ability to modify the following:
-
Email: Edit the user's email address in this field. Ensure the updated email is accurate as it serves as a unique identifier for the user within the system.
-
Role: Modify the user's role as necessary. Roles define the user’s permissions and access levels within the system. Choose the appropriate role from the available options, such as 'Admin,' 'Moderator,' 'User,' or other custom roles tailored to your organization's requirements.
-
Password: Change the user's password if required. Creating a strong and secure password is crucial for account security. Follow password guidelines, including a mix of uppercase and lowercase letters, numbers, and special characters. Encourage users to update passwords periodically to enhance security.
-
Confirm Password: Re-enter the new password in this field to confirm its accuracy. This step prevents typographical errors and ensures the user has entered the intended password correctly.